Webforms may only be created/edited by group managers and moderators.
As a manager or moderator of a group you can post web which will show up in the activity stream and can then be embedded in panel pages of your group.
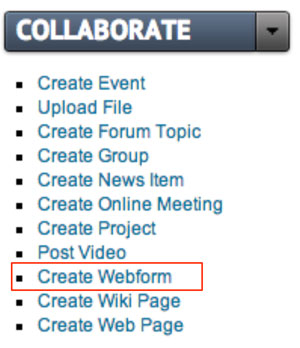
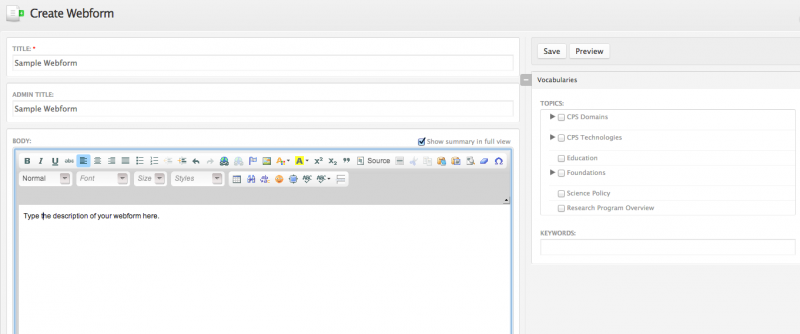
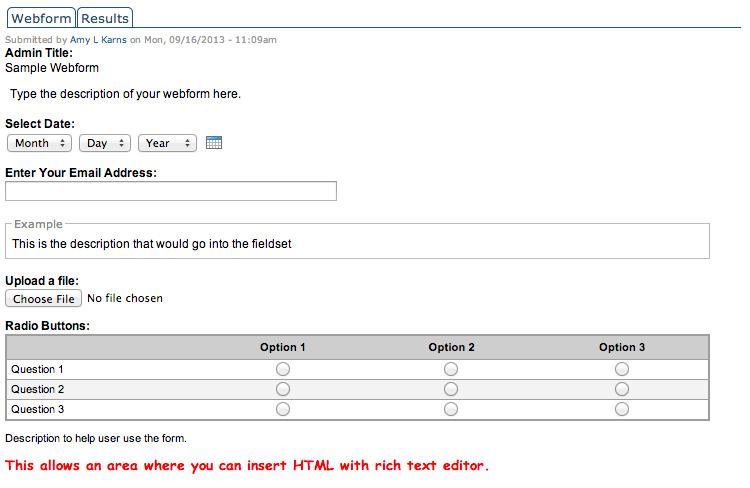
Create Webform and add components
 Video example


Types of Components:
- Date: Inserts a drop-down menu for user to select a month/day/year. Optional calendar selector is also available.
- Email: A field where user can enter their email address
- Fieldset: A boxed field that contains a description and a title
- File: A place where user can upload a file.
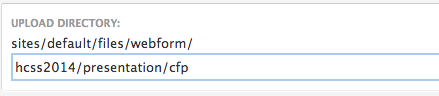
*NOTE: Create a custom directory by typing a path similar to the one below. This identifies attachments with the webform. - Grid: a series of questions and options with radio button selectors
- Hidden: This gives you the option to insert variables or notes which users cannot see.
- Markup: This allows webform creator to enter text in multiple colors and font styles.
- Textfield: You can collect lengthier responses from your users by creating "textarea" fields
- Number: Creates either a dropdown menu or a text area with predetermined low and high integers.
- Page break: Allows you to split your webform into 2 pages.
- Select Options: Makes a list of options with radio buttons.
- Textarea: You can collect lengthier responses from your users by creating "textarea" fields
- Textfield: A one line field for user to enter text.
- Time: A dropdown hr/minut/am/pm selector


Configuring Notification Emails
Video example
- The first is the email address (or multiple addresses) of the webform administrators.
- The second will be the submitter's email address as they typed it in the "email" field on the webform.
*NOTE: You must include at least one email component field in the webform to enable this function.
 |
To get to the configuration settings:
|
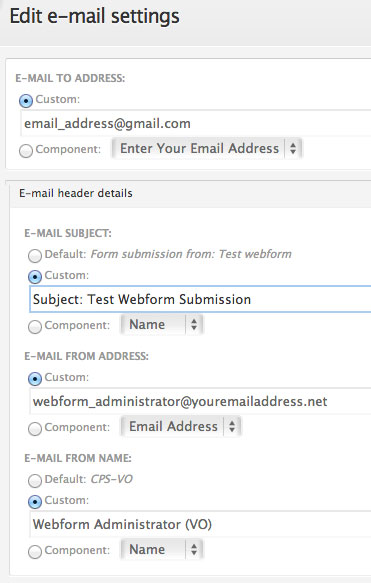 |
After clicking the "Add" button, you will be taken to a page where email settings can be configured.
Email Address:The Email To address has already been configured in the previous step. You may choose to change it if necessary. Email Header Details
|
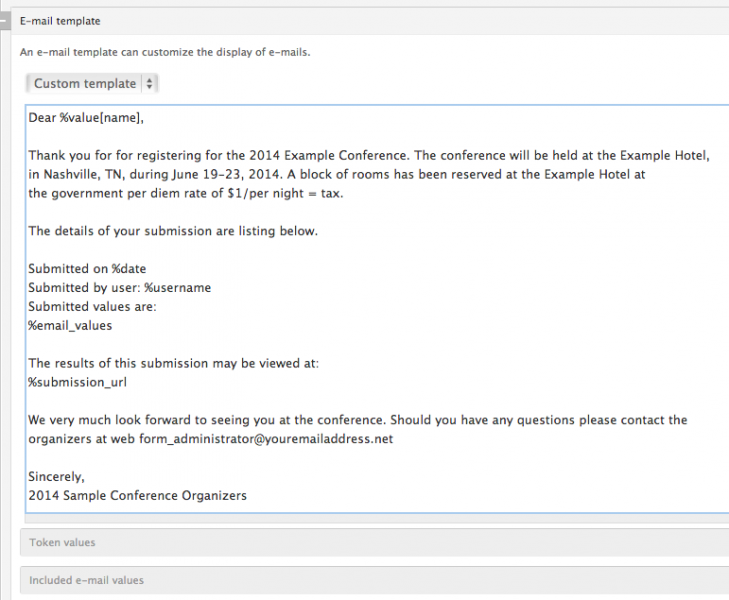 |
Email Template SettingsA default email template already exists in the Email Template window. However, you can customize the message to suit your needs. Left is an example of custom elements added to the template. Values can be found by expanding the token values section beneath the template. A token value was used in the custom template below to populate the user's name (Dear %value[name]). |
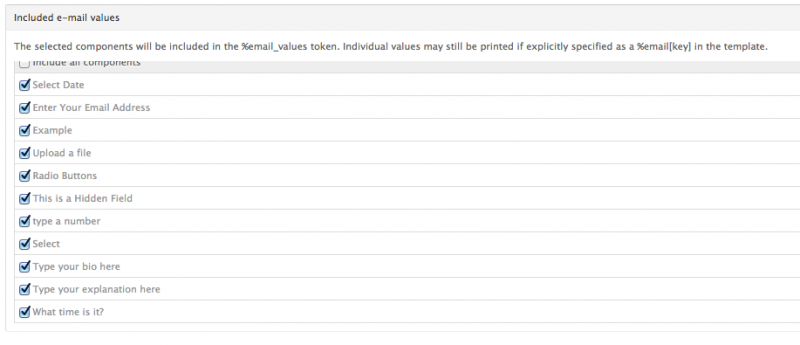 |
Included E-mail ValuesAll of the webform field components are listed in the expandible section called "Included e-mail values" with checkboxes next to each value. All components will be included by default in the notification email. You may choose to deselect components you wish to be excluded from the email. |
 |
Click the "Save e-mail settings" button to save your changes and go back to the previous page where you can set up more email notifications if desired. |
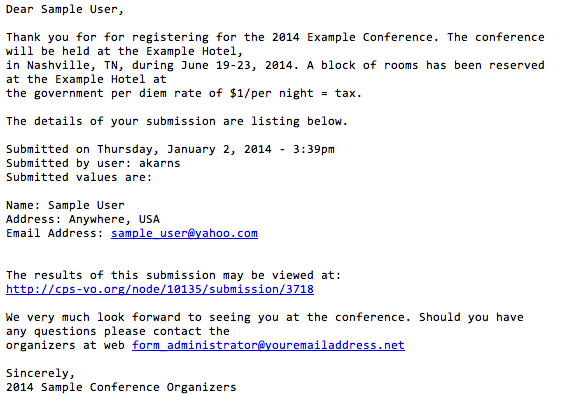 |
An example of a notification email. |
Configuring Form Settings
Video example
The "Form Settings" tab will take you to a page where you can choose a landing page, set submission limits, and choose access policies.
Submission Settings
Landing page option with confirmation message
The webform user will be taken to a landing page after submitting the form. You may choose (three options shown in image below) where the user is redirected.
- Confirmation Page - Sends user to generic CPS-VO.org confirmation page.
- Custom URL - Redirects the user to a custom page (most usually the group home page)
- No Redirect - Reloads current page.

Submissions Limit
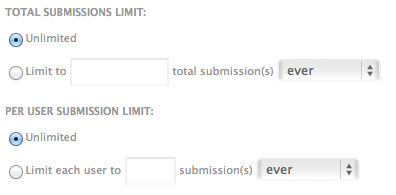 |
Limit the number of times the webform can be submitted globally or on a per-user basis by clicking the desired radio buttons and/or typing a number in the text box. |
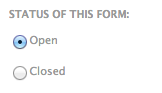 |
Status of this FormAfter your submission period has ended you can close the form (or reopen it) with the radio button settings. |
Submission Access
 |
Select which user roles are able to view and submit the form. Note: Only authenticated users (CPS-VO members) are able to edit their submissions. |
Configuring Form Validation and Access Policies
- Specific value(s)
- Verifies that the specified component contains a defined value (select, textfield, textarea, email, hidden, select)
This feature would be used (for example) when a code is required to submit the form. The webform can then be viewable by anonymous users, but can only be submitted by users who have the code.
Export the Webform
 |
Clicking the export button will prompt a download of the PHP code generated to create the form. |
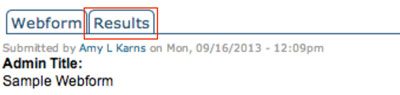
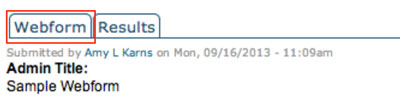
Access Webform Results
 |
|
 |
Secondary tabs at the top right include analysis, table, and download.
|
View/Edit Individual Submissions
It's easiest to access individual results from the "table" view. Click on the submission number on the far left of the column. That will take you to their individual submission where you can edit the submissions if needed.
 |
|
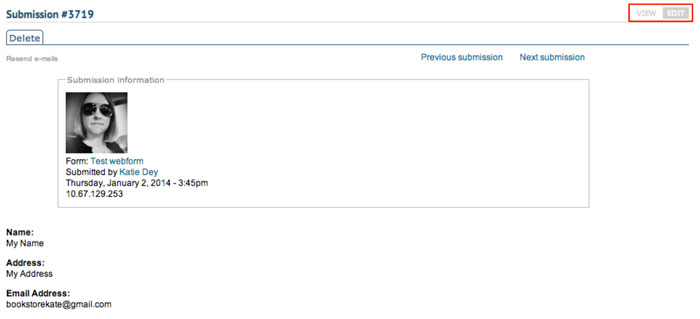 |
This will take you to a window where you can view and edit the individual submission. |
Edit the Webform
 |
|
 |
This will take you into the component panel where you can edit or delete components via the links to the far right of each component title. |

Webform Check List
![]() Does your webform have a description?
Does your webform have a description?
![]() Is your webform published?
Is your webform published?
![]() Is your webform public or is it private to your group?
Is your webform public or is it private to your group?
![]() Have you created all the components you need?
Have you created all the components you need?
![]()
Are the necessary components set as mandatory?
![]()
Have you configured notification emails to go to the user and also to the form administrator?
![]() Have you configured the confirmation landing page?
Have you configured the confirmation landing page?
![]() Have you configured the submission access rules?
Have you configured the submission access rules?
![]() Does your webform need an access code? Has one been configured?
Does your webform need an access code? Has one been configured?
![]()
Have the necessary users been granted permissions to view the webform results?