Managers can create Wikis for their group where they and their group members will be able to add and edit shared pages (see "Creating a Wiki Page")
 |
Make sure you have already created your first wiki page before you add the wiki widget to your group. If not, you can use the "Collaborate" toggle menu to get started. Click "Create Wiki Page" to launch the rich text editor. |
 |
You can then find the node ID number in the top address bar. |
 |
After you create your first wiki page, create a panel page and name it "Wiki" (see “Creating Custom Pages”). Click “Edit content” link to the right of the title of your "Wiki" panel page. |
 |
You will be taken to a page that shows the regions of your panel page. Click on the gear icon in the upper left corner of the full-width region in which you want your wiki to display. The "Wiki" widget works best if placed in the Top or Bottom region of your panel page display settings due to its horizontal layout. |
 |
Select "Add content" from the dropdown menu. |
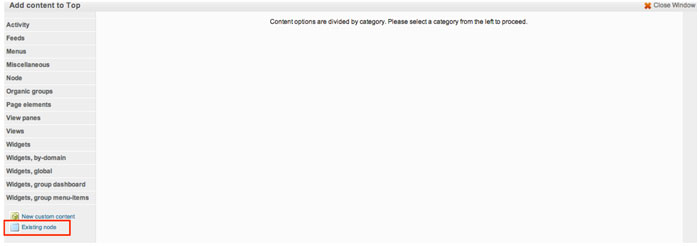 |
This will take you to a page where you can add widgets and custom content. Click the "Existing node" link in the bottom left menu to begin. |
 |
This will launch a form. Type the node ID number of your first wiki page in the first text field. |
 |
Don’t forget to click the “Finish” button when you’re done typing. |
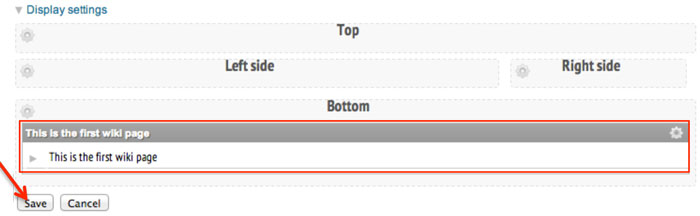 |
Click the "Save" button at the bottom of your panel regions page to set your changes. |
 |
Your first wiki page will now be displayed on your "Wiki" panel page. Group members can now add and edit shared pages (see "Creating a WIki Page"). |